

These dilly beans are snappy, tangy, garlicky, and ready to eat in just 24 hours with no canning equipment required.
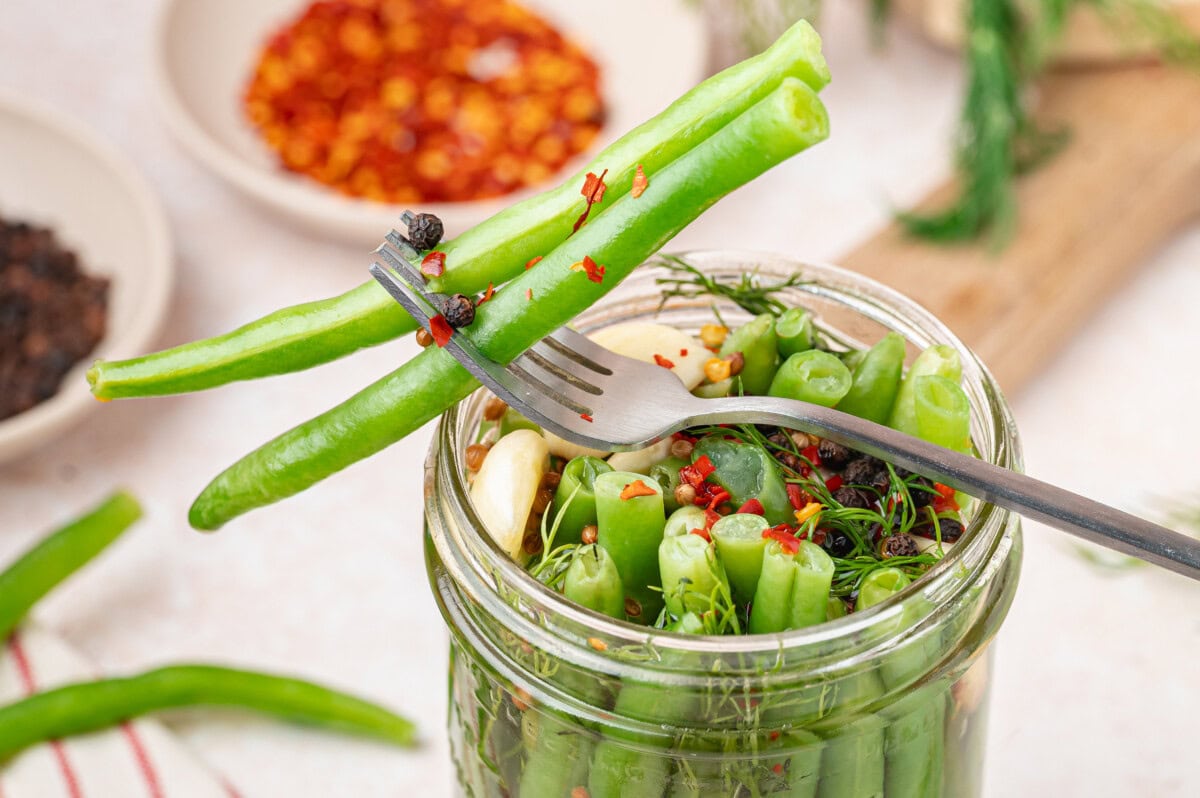
Brined in a simple white vinegar brine with mustard seeds, peppercorns, red pepper flakes, and plenty of fresh dill, dilly beans are the perfect crunchy snack, cocktail garnish, or charcuterie board addition.
Jump to:
Ingredients for Dilly Beans
The ingredient list here is short but the flavor results are big. Here’s a quick look at what goes into the jar:
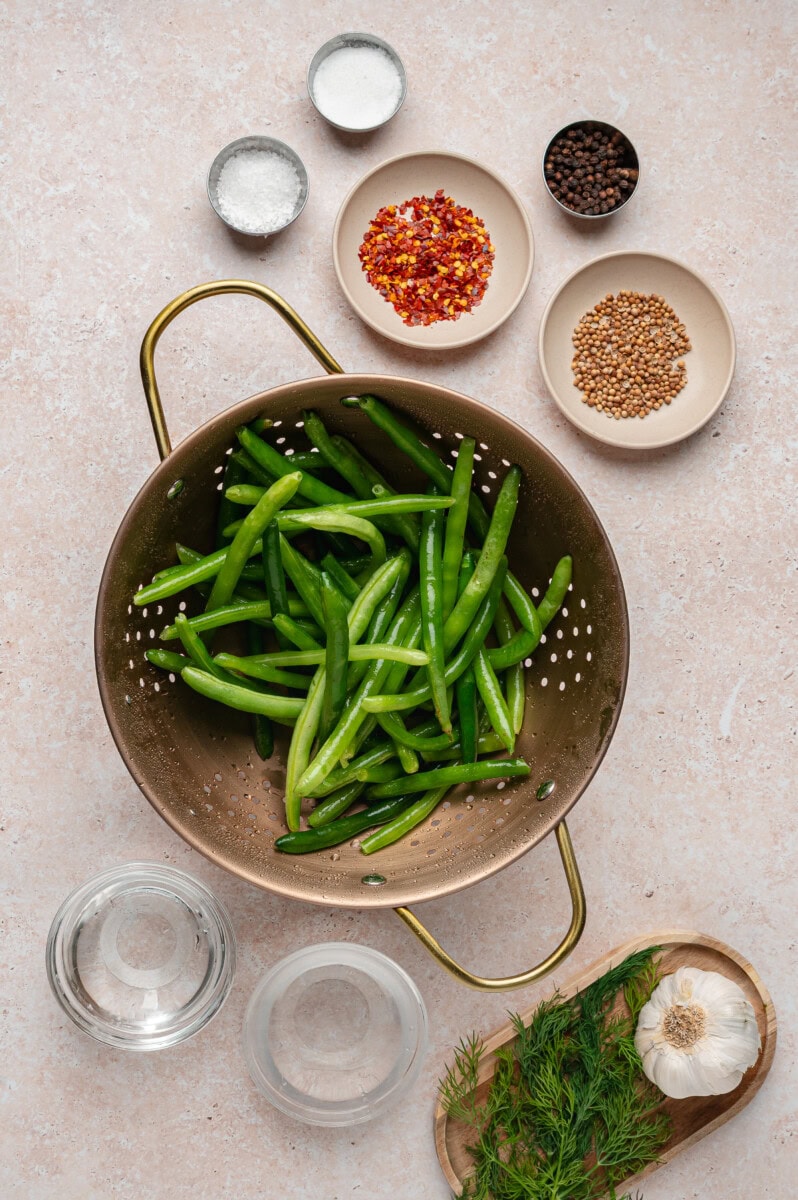
- Fresh green beans
- White vinegar
- Kosher salt
- Granulated sugar
- Fresh garlic
- Mustard seeds
- Black peppercorns
- Red pepper flakes
- Fresh dill sprigs
See recipe card for quantities.
Instructions
Making dilly beans is surprisingly simple! Pack your trimmed green beans upright in the jar, pressing them in tightly, then tuck the garlic, dill, and spices down around them. Combine the water, vinegar, salt, and sugar in a saucepan, bring to a gentle boil until dissolved. Once cooled to room temperature, seal the jar and refrigerate for at least 24 hours — but for the best flavor, try to hold out for 2 to 3 days. The beans will keep in the fridge for up to a month.
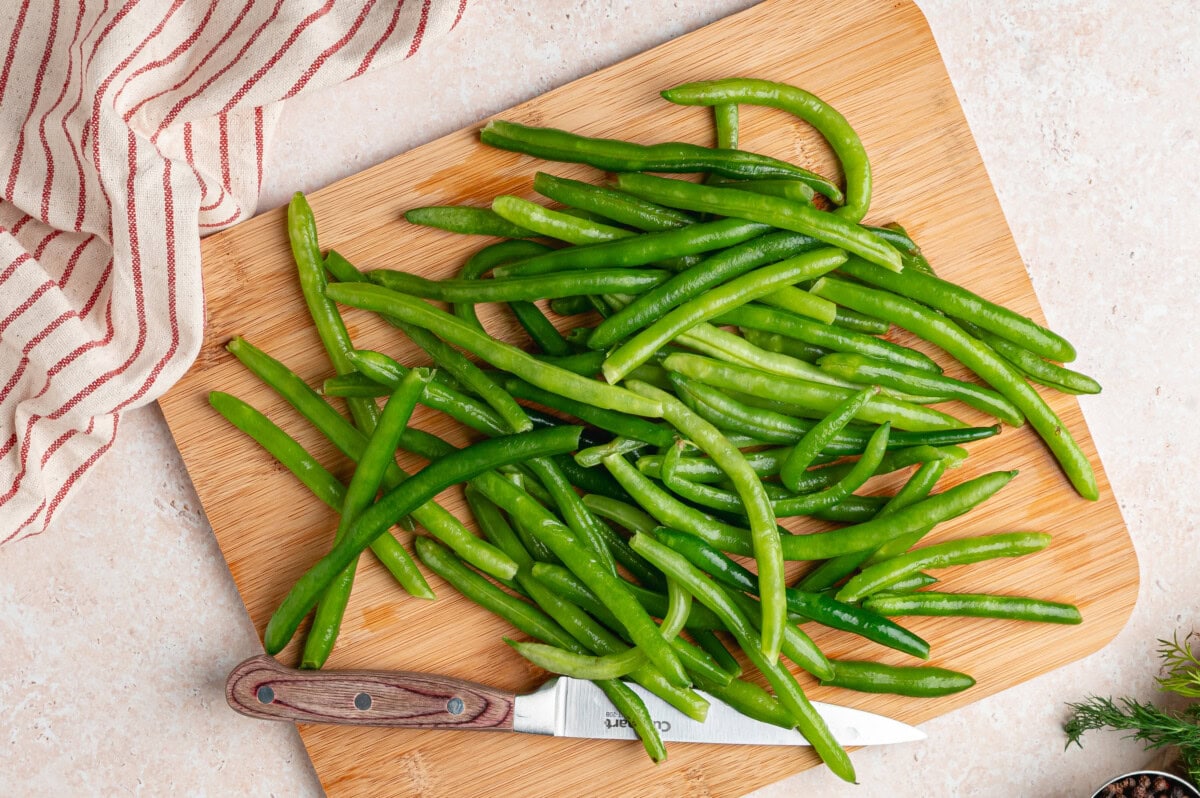
Step 1: Trim the green beans so they fit just below the rim of the jar. Stand the beans upright in the jar and pack them in tightly so they stay in place once the brine is added.
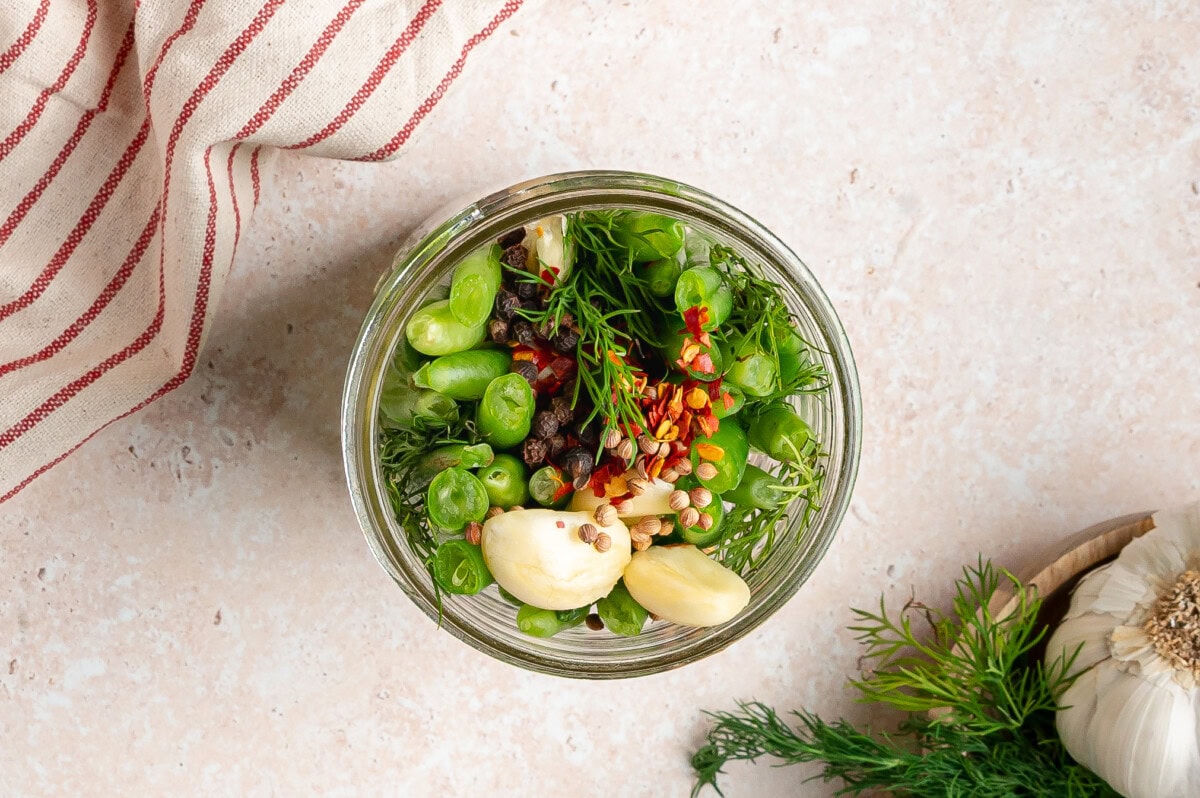
Step 2: Add the garlic, mustard seeds, black peppercorns, red pepper flakes, and fresh dill to the jar. Tuck the seasonings down around the beans.
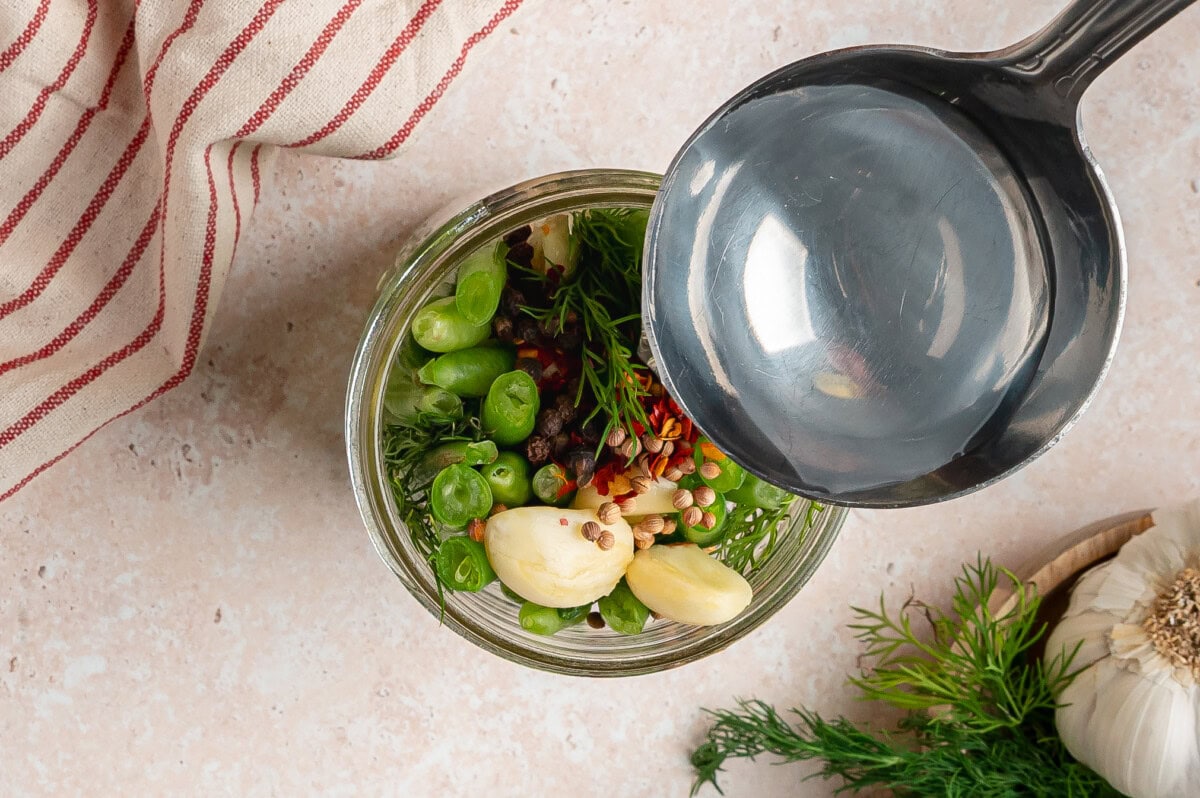
Step 3: Add the water, vinegar, salt, and sugar to a medium saucepan. Bring the brine to a gentle boil over medium heat and stir until the salt and sugar dissolve. Let it rest for five minutes to cool down slightly.
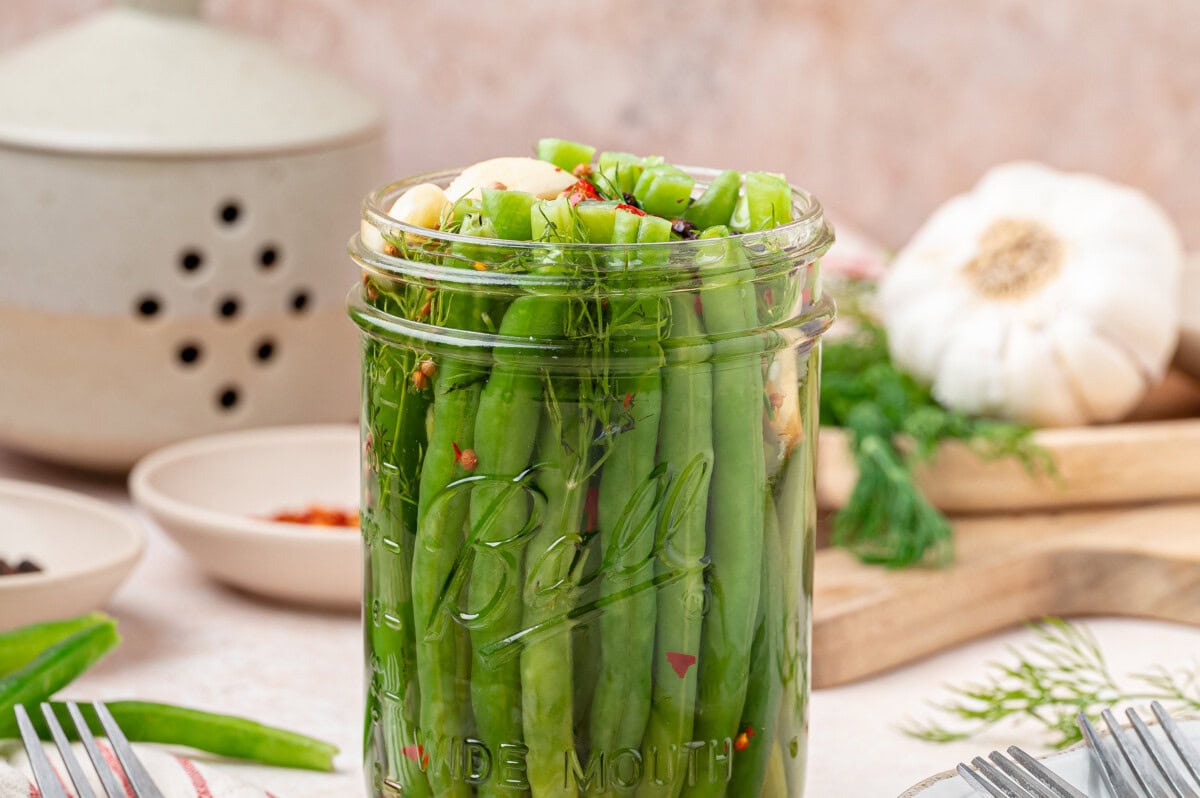
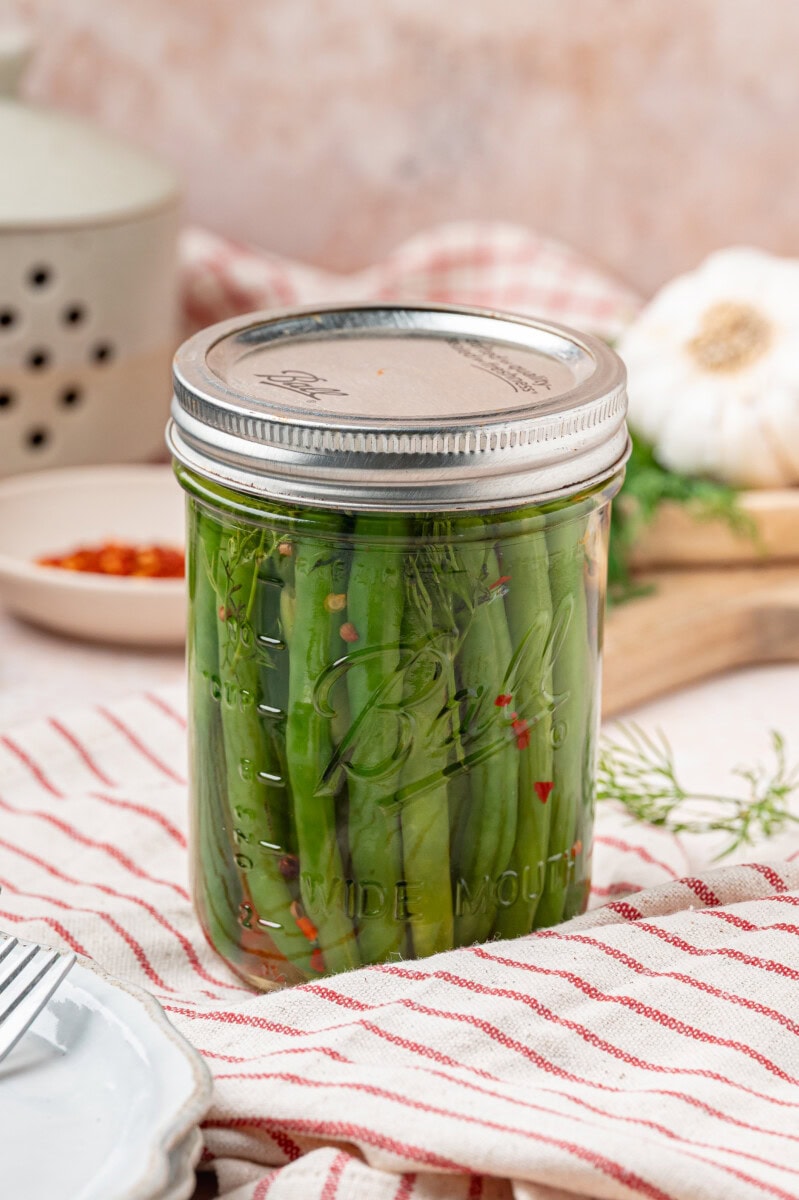
Step 4: Add the brine to the jar until the beans are fully covered. Leave a little space at the top. Cool the jar at room temperature until it is no longer hot. Seal it and refrigerate for at least 24 hours before serving.
Variations & Substitutions
- Swap the white vinegar for apple cider vinegar or do a mix of both.
- Add a few jalapeño slices if you want some heat.
Equipment
Dilly beans require only a few pieces of simple equipment.
- Mason jars for storage
- Sauce pan to boil water
- Chef’s knife for veggie prep
Storage
Store the jar in the refrigerator for up to a month. The flavor gets stronger over the first few days.
Top Tips
- Pack the dilly beans tightly so they don’t float too much once the brine is added.
- Trim the beans evenly so the lid closes easily and the beans stay under the brine.
- Give the jar at least a full day before tasting. The center of the beans needs time to absorb the brine.
FAQ
Fresh beans work much better here. Frozen beans usually turn soft and water once they sit in the brine.
Fresh dill gives the best flavor here, but in a pinch you can substitute about 1 teaspoon of dried dill weed.
Stored in a sealed jar in the refrigerator, they’ll keep well for up to a month, but are best used within 2 weeks.
Reduce or omit the red pepper flakes entirely for a less spicy version.
That usually means the beans were older or a little dehydrated before pickling. They are still fine to eat, but fresher beans hold their shape better.
Dilly Beans
- Total Time: 20 minutes
- Yield: 6 servings 1x
- Diet: Low-Carb, Vegan, Vegetarian
Ingredients
12 ounces fresh green beans, washed and trimmed to fit the jar
1 cup water
1 cup white vinegar
2 teaspoons kosher salt
2 teaspoons granulated sugar
2 cloves garlic, peeled and lightly smashed
¾ teaspoon mustard seeds
½ teaspoon black peppercorns
½ teaspoon red pepper flakes
3 fresh dill sprigs
Instructions
- Trim the green beans so they fit just below the rim of the jar. Stand the beans upright in the jar and pack them in tightly so they stay in place once the brine is added.
- Add the garlic, mustard seeds, black peppercorns, red pepper flakes, and fresh dill to the jar. Tuck the seasonings down around the beans.
- Add the water, vinegar, salt, and sugar to a medium saucepan. Bring the brine to a gentle boil over medium heat and stir until the salt and sugar dissolve. Let it rest for five minutes to cool down slightly.
- Add the brine to the jar until the beans are fully covered. Leave a little space at the top.
- Cool the jar at room temperature until it is no longer hot. Seal it and refrigerate for at least 24 hours before serving. For the best flavor, wait 2 to 3 days before opening.
- Prep Time: 15 minutes
- Cook Time: 5 minutes
- Category: Condiments
- Method: Pickling
- Cuisine: American, French, Greek, Mediterranean
I love this new recipe! I’ve just been eatting the beans as a snack.